| .. | ||
| src | ||
| autoTesterMismatchExample.PNG | ||
| CMakeLists.txt | ||
| Create.PNG | ||
| Evaluate.PNG | ||
| README.md | ||
| setup_7z.PNG | ||
| TestRail.PNG | ||
| TestRailSelector.PNG | ||
| Windows.PNG | ||
Auto Tester
The auto-tester is a stand alone application that provides a mechanism for regression testing. The general idea is simple:
- Each test folder has a script that produces a set of snapshots.
- The snapshots are compared to a 'canonical' set of images that have been produced beforehand.
- The result, if any test failed, is a zipped folder describing the failure.
Auto-tester has 4 functions, separated into 4 tabs:
- Creating tests, MD files and recursive scripts
- Evaluating the results of running tests
- TestRail interface
- Windows task bar utility (Windows only)
Installation
Executable
- Download the installer by browsing to here.
- Double click on the installer and install to a convenient location
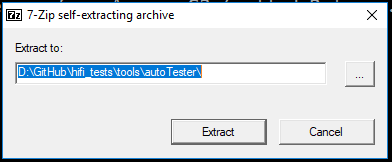
- To run the auto-tester, double click auto-tester.exe.
Python
The TestRail interface requires Python 3 to be installed. Auto-Tester has been tested with Python 3.7.0 but should work with newer versions.
Python 3 can be downloaded from:
- Windows installer https://www.python.org/downloads/
- Linux (source) https://www.python.org/downloads/release/python-370/ (Gzipped source tarball)
- Mac https://www.python.org/downloads/release/python-370/ (macOS 64-bit/32-bit installer or macOS 64-bit/32-bit installer)
After installation - create an environment variable called PYTHON_PATH and set it to the folder containing the Python executable.
Create
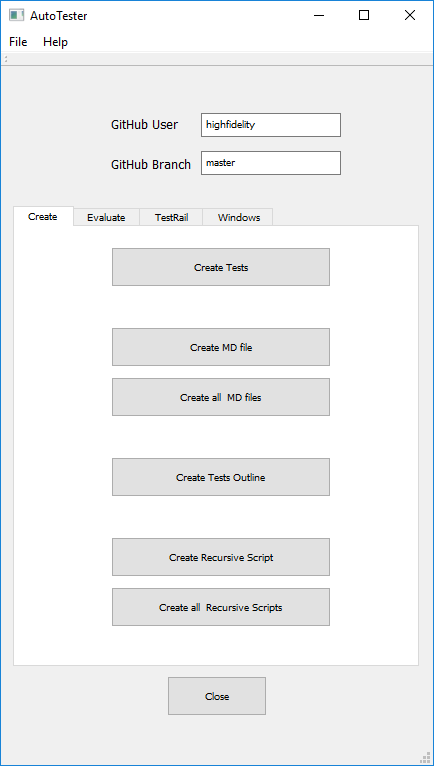
The Create tab provides functions to create tests from snapshots, MD files, a test outline and recursive scripts.
Create Tests
Usage
This function is used to create/update Expected Images after a successful run of a test, or multiple tests.
The user will be asked for the snapshot folder and then the tests root folder. All snapshots located in the snapshot folder will be used to create or update the expected images in the relevant tests.
Details
As an example - if the snapshots folder contains an image named tests.content.entity.zone.zoneOrientation.00003.png, then this file will be copied to tests/contente/enity/zone/zoneOrientation/ExpectedImage0003.png.
Create MD file
Usage
This function creates a file named test.md from a test.js script. The user will be asked for the folder containing the test script:
Details
The process to produce the MD file is a simplistic parse of the test script.
-
The string in the
autoTester.perform(...)function call will be the title of the file -
Instructions to run the script are then provided:
Run this script URL: Manual Auto(from menu/Edit/Open and Run scripts from URL...).
-
The step description is the string in the addStep/addStepStepSnapshot commands
-
Image links are provided where applicable to the local Expected Images files
Create all MD files
Usage
This function creates all MD files recursively from the user-selected root folder. This can be any folder in the tests hierarchy (e.g. all engine\material tests).
The file provides a hierarchial list of all the tests
Create Tests Outline
Usage
This function creates an MD file in the (user-selected) tests root folder. The file provides links to both the tests and the MD files.
Create Recursive Script
Usage
After the user selects a folder within the tests hierarchy, a script is created, named testRecursive.js. This script calls all test.js scripts in the subfolders.
Details
The various scripts are called in alphabetical order.
An example of a recursive script is as follows:
// This is an automatically generated file, created by auto-tester on Jul 5 2018, 10:19

PATH_TO_THE_REPO_PATH_UTILS_FILE = "https://raw.githubusercontent.com/highfidelity/hifi_tests/master/tests/utils/branchUtils.js";
Script.include(PATH_TO_THE_REPO_PATH_UTILS_FILE);
var autoTester = createAutoTester(Script.resolvePath("."));

var testsRootPath = autoTester.getTestsRootPath();

if (typeof Test !== 'undefined') {
    Test.wait(10000);
};

autoTester.enableRecursive();
autoTester.enableAuto();

Script.include(testsRootPath + "content/overlay/layer/drawInFront/shape/test.js");
Script.include(testsRootPath + "content/overlay/layer/drawInFront/model/test.js");
Script.include(testsRootPath + "content/overlay/layer/drawHUDLayer/test.js");

autoTester.runRecursive();
Create all Recursive Scripts
Usage
In this case all recursive scripts, from the selected folder down, are created.
Running this function in the tests root folder will create (or update) all the recursive scripts.
Evaluate
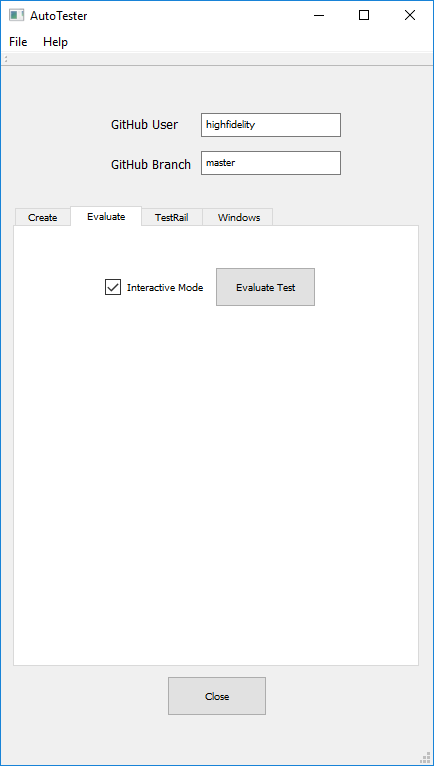
The Evaluate tab provides a single function - evaluating the results of a test run.
A checkbox (defaulting to checked) runs the evaluation in interactive mode. In this mode - every failure is shown to the user, who can then decide whether to pass the test, fail it or abort the whole evaluation.
If any tests have failed, then a zipped folder will be created in the snapshots folder, with a description of each failed step in each test.
Usage
Before starting the evaluation, make sure the GitHub user and branch are set correctly. The user should not normally be changed, but the branch may need to be set to the appropriate RC.
After setting the checkbox as required and pressing Evaluate - the user will be asked for the snapshots folder.
Details
Evaluation proceeds in a number of steps:
-
A folder is created to store any failures
-
The expecetd images are download from GitHub. They are named slightly differently from the snapshots (e.g.
tests.engine.render.effect.highlight.coverage.00000.pngandtests.engine.render.effect.highlight.coverage.00000_EI.png). -
The images are then pair-wise compared, using the SSIM algorithm. A fixed threshold is used to define a mismatch.
-
In interactive mode - a window is opened showing the expected image, actual image, difference image and error:
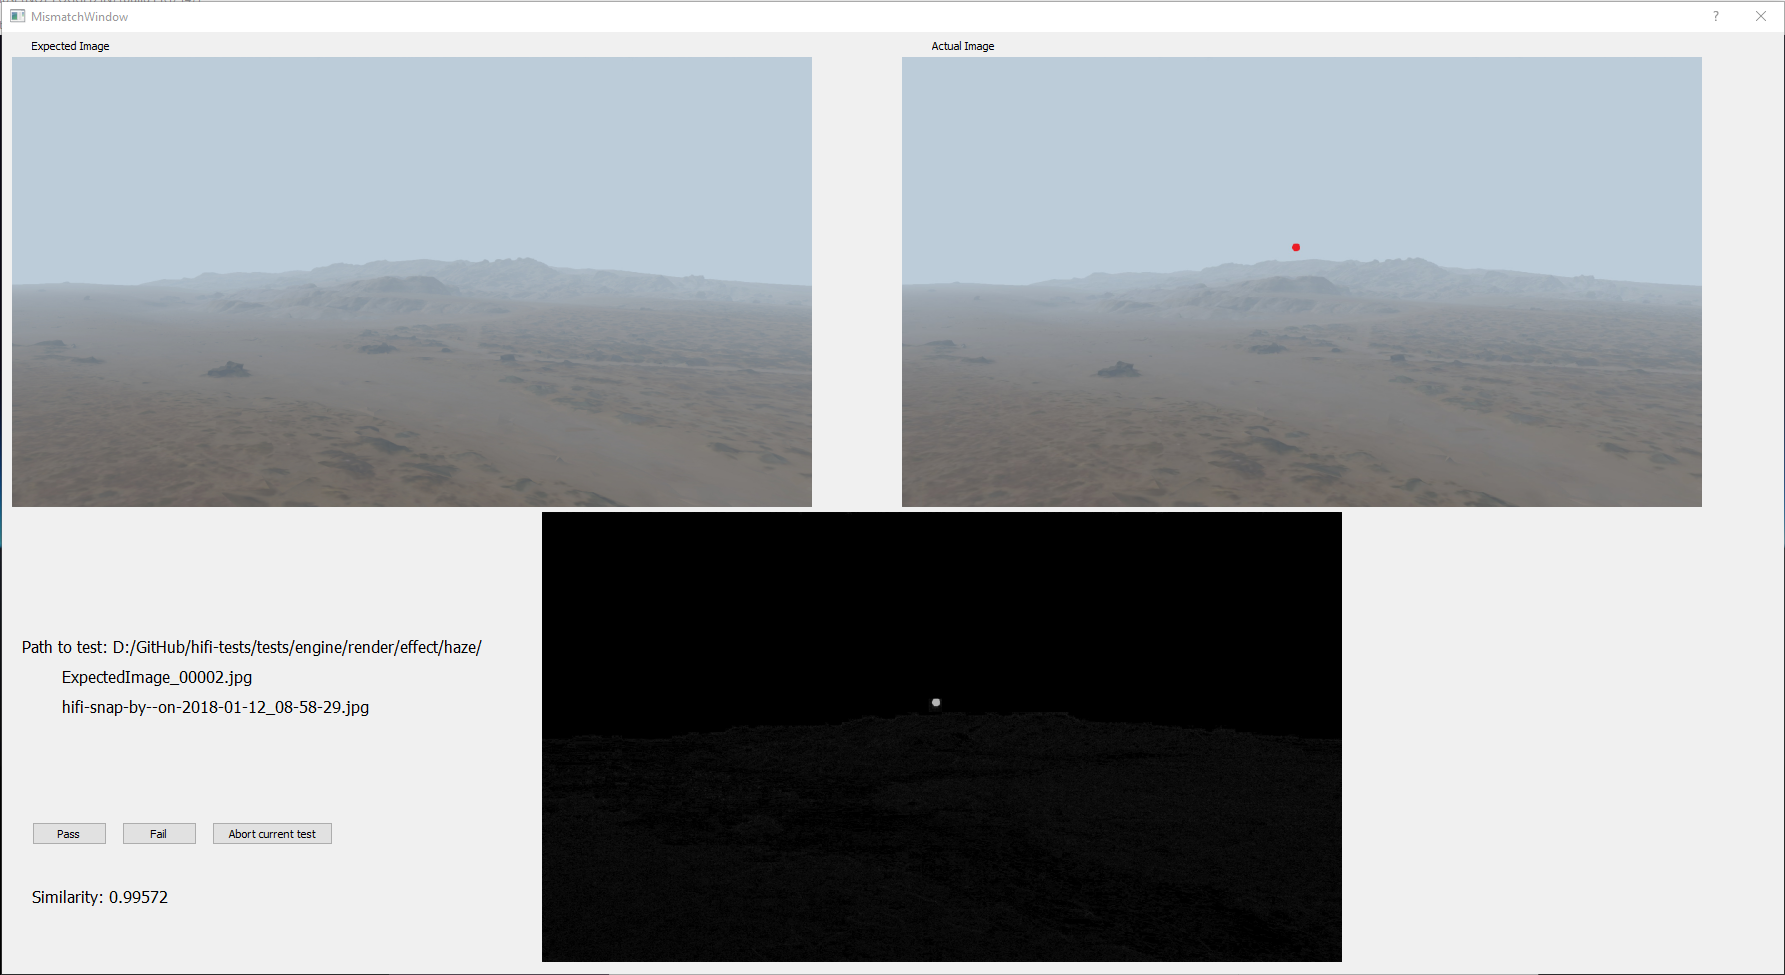
-
If not in interactive mode, or the user has defined the results as an error, an error is written into the error folder. The error itself is a folder with the 3 images and a small text file containing details.
-
At the end of the test, the folder is zipped and the original folder is deleted. If there are no errors then the zipped folder will be empty.
TestRail
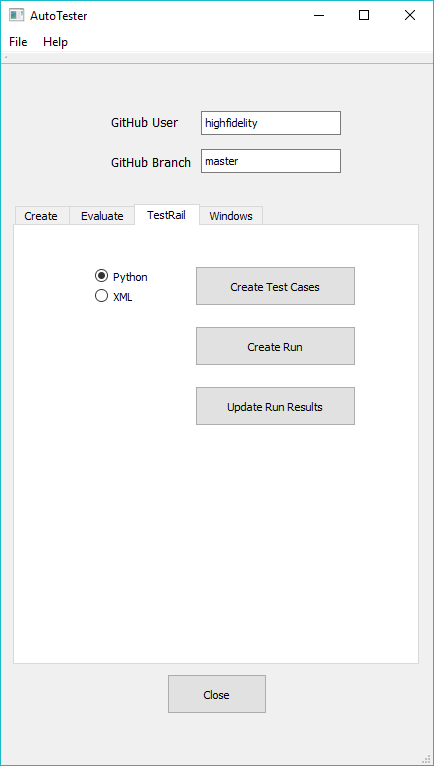
Before updating TestRail, make sure the GitHub user and branch are set correctly. The user should not normally be changed, but the branch may need to be set to the appropriate RC.
Any access to TestRail will require the TestRail account (default is High Fidelity's account), a user-name and a password:
- The default test rail user is shown, and can be changed as needed.
- The username is usually the user's email.
- The Project ID defaults to 14 - Interface.
- The Suite ID defaults to 1147 - Renderong.
- The TestRail page provides 3 functions for writing to TestRail.
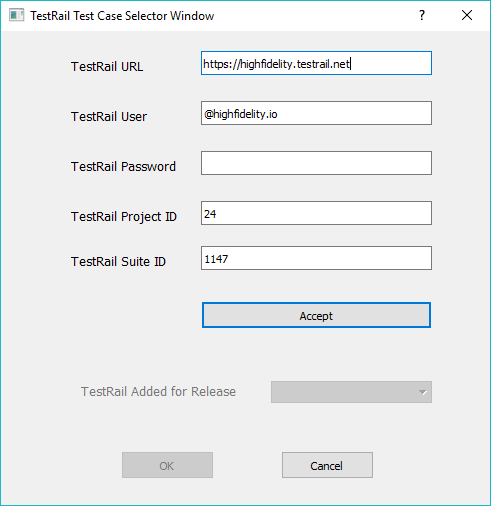
Create Test Cases
Usage
This function can either create an XML file that can then be imported into TestRail through TestRail itself, or automatically create the appropriate TestRail Sections.
The user will be first asked for the tests root folder and a folder to store temporary files (this is the output folder).
If XML has been selected, then the XML file will be created in the output folder.
If Python is selected, the user will then be prompted for TestRail data. After pressing Accept - the Release combo will be populated (as it needs to be read from TestRail).
After selecting the appropriate Release, press OK. The Python script will be created in the output folder, and the user will be prompted to run it.
A busy window will appear until the process is complete.
Details
A number of Python scripts are created:
testrail.pyis the TestRail interface code.stack.pyis a simple stack classgetReleases.pyreads the release names from TestRailaddTestCasesis the script that writes to TestRail.
In addition - a file containing all the releases will be created - releases.txt
Create Run
A Run is created from previously created Test Cases.
The user will first be prompted for a temporary folder (for the Python scripts).
After entering TestRail data and pressing Accept - the Sections combo will be populated (as it needs to be read from TestRail).
After selecting the appropriate Section, press OK. The Python script will be created in the output folder, and the user will be prompted to run it.
A busy window will appear until the process is complete.
Details
A number of Python scripts are created:
testrail.pyis the TestRail interface code.stack.pyis a simple stack classgetSections.pyreads the release names from TestRailaddRunis the script that writes to TestRail.
In addition - a file containing all the releases will be created - sections.txt
Update Run Results
This function updates a Run with the results of an automated test.
The user will first be prompted to enter the zipped results folder and a folder to store temporary files (this is the output folder).
After entering TestRail data and pressing Accept - the Run combo will be populated (as it needs to be read from TestRail).
After selecting the appropriate Run, press OK. The Python script will be created in the output folder, and the user will be prompted to run it.
A busy window will appear until the process is complete.
Details
A number of Python scripts are created:
testrail.pyis the TestRail interface code.getRuns.pyreads the release names from TestRailaddRunis the script that writes to TestRail.
In addition - a file containing all the releases will be created - runs.txt
Windows
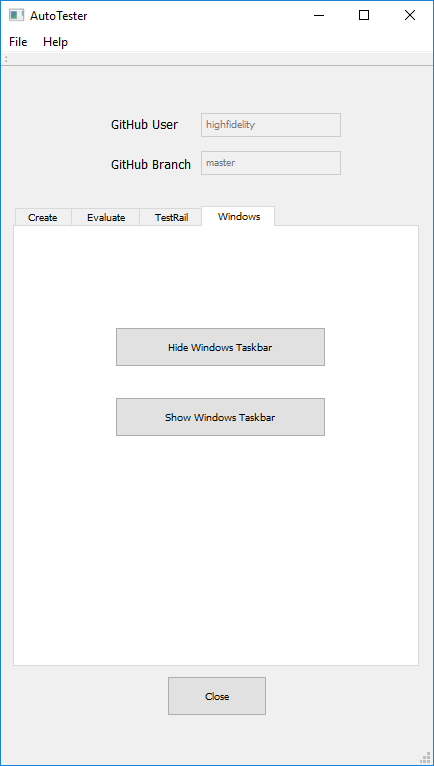
This tab is Windows-specific. It provides buttons to hide and show the task bar.
The task bar should be hidden for all tests that use the primary camera. This is required to ensure that the snapshots are the right size.